Stonecrete veneer is a durable and affordable option to add character and charm to your home. It can be installed over clean concrete, masonry, and stucco walls.
To prepare for your project, make sure the wall is ready to accept stone. Then mix a mortar from 1 part type S masonry cement and 2.5 parts sand.
Stone is one of the heaviest and densest materials used in construction. It is also highly fire-resistant and has a natural durability that resists environmental damage, including fading over time. It is also relatively low-maintenance and requires only periodic repairs from a skilled mason. However, stone is more expensive as a material, and installation is labor intensive.
Manufactured Stone is a popular alternative to natural stone, but has its own set of limitations and problems. Like all concrete-based products, manufactured stone is susceptible to moisture damage if left untreated. It is therefore important to treat all manufactured stone veneer applications with a silane-based, non-film forming, breather-type masonry sealer. This will increase the durability of your project and help prevent water penetration and resulting mold growth.
In addition, it is a good idea to use a rainscreen system when installing stone veneer on your home. This will reduce the amount of rain and snow that can penetrate the walls, preventing moisture from damaging the stone, framing or siding of your home.
Another problem that can occur with some types of stone facing is Efflorescence, a white residue that appears on the surface of certain stones when they come into prolonged contact with moisture. It is caused by the release of salts from the cement in the mortar, and can be removed by washing with water and a mild detergent.
It is also possible to add color pigments to the mix for a variety of finishes. This will give you the ability to match your stone with the surrounding colors of your home, and allow for more customization in your finished product.
In addition to color options, there are different textures available for both natural and manufactured stone. Ledgestone, roughly rectangular and mosaic styles are available, as well as several color blends. To enhance the texture of your project, you can add a textured scratch coat. This will also improve the adhesion between your mortar and the stone.
Styles & Options
A wide variety of colors, textures and shapes can be created using concrete stone casting. This allows for the production of a realistic surface that closely mimics natural stone. This gives builders the opportunity to create a unique and custom facade for their projects that can fit any design style or taste. The color of the stones will not fade with time and they are resistant to weathering and damage.
Stone facing can be used to craft a visually striking accent wall, frame a fireplace or completely clad an exterior facade. It can also be used to add dimension to a space or craft decorative elements like columns, arches and door surrounds. In outdoor spaces, stone facing can be used to build fire pits, water features and statues that add interest to any landscape design.
Compared to traditional masonry methods, mortarless easy-to-install stone veneer offers significant cost savings. However, you will need to strike a balance between the quality of materials and cost for the best value. It is important to choose the right type of stone and installation method to ensure a long-lasting and beautiful result.
While manmade and stone veneer products are easier to install, they lack the durability and lifetime weather resistance of natural stone. Manufactured stone veneers are prone to chipping, which exposes the concrete interior. This can cause problems with moisture management. On the other hand, natural stone is more durable, can withstand high moisture content and performs better in freezing/thawing conditions.
When selecting a stone facing system, you can choose between two overarching categories: individualized systems or panelized systems. Individually fabricated stone veneers allow you to hide high visibility cuts and reuse scrap pieces that would otherwise be discarded in other alternatives. They also have good workability and can easily adapt to an uneven substrate. Panelized systems are a good choice for larger projects because they install faster and require fewer tools.
Regardless of the type of stone you select, you will need to develop a moisture management plan. Moisture causes Efflorescence, which is white powdery substance that appears on the surface of the stone. To prevent Efflorescence, you must use a waterproofing membrane on the substrate and install flashing around all doors and windows. You should also make sure your gutter and drainage system is properly channeling water away from your stone veneer application.
Low Maintenance
Retaining walls are multifunctional additions to landscapes with varying slopes and gradients. They help hold soil and plants in place to prevent erosion while enhancing the look of the property. Many homeowners choose concrete wall block faces to give the sophisticated and ageless appearance of natural stone but at a much more cost-effective price point than traditional quarried stone. To further enhance the look of these concrete structures, contractors can add stone veneer to create a visually stunning exterior cladding.
When properly installed, stone veneer offers a long lifespan and requires little maintenance to keep its beautiful appearance. Because it is a real stone product, stone facing is durable in harsh environments and resists scratching and fading over time. The materials used to create stone veneer are also naturally resistant to moisture and freeze/thaw cycles, so they can be used in climates that would damage other cladding products like vinyl and wood.
Natural stone is a green building product that can qualify projects for LEED credits. It’s made from materials that are 100% recyclable, and unlike manufactured stone, it has no added dyes or pigments that can fade with exposure to sunlight. Additionally, natural stone is four times more durable and emits two times less carbon emissions than manufactured masonry.
Before installing stone veneer, the installer should prepare the wall surface to ensure that it will adhere. This includes ensuring the concrete or concrete masonry substrate is free of dirt, waterproofing coatings, paint, form oil and has a rough texture to promote a mortar bond. The installer must also ensure the concrete is cured prior to installation.
If the masonry surface is not sufficiently cured, it may be necessary to install a drainage mat or furring strips prior to the installation of stone veneer. This will provide an air gap between the masonry and the veneer, and it can also serve to reduce the risk of water seepage through the stone face that could potentially compromise the integrity of the foundation.
Whether you’re constructing a new home or updating the appearance of an existing structure, stone veneer is an easy way to improve the curb appeal and value of your property. Using stone facing to craft an accent wall, frame a fireplace or clad the entire foundation facade can instantly elevate your property. If you’re considering adding stone to your next project, contact us for more information about our wide range of options.
Easy Installation
Many homeowners choose to install stone facing on their walls, pillars, and arches to add texture, warmth and style. They can be laid with tight-fitting mortar joints for a more traditional look or without joints to achieve a “dry-stacked” appearance. Stone and brick veneers are available in a variety of shapes and sizes and can complement any style home. They are also a great option for a fireplace accent wall to frame the focal point and create a dramatic statement.
The installation process is relatively simple and straightforward once the proper steps are taken to prepare the surface. Most importantly, the installer must ensure that the wall to which he or she is installing the stone veneer is plumb. This will expedite the veneering process and help produce a more polished finish.
It is a good practice to lay out all of the veneer stone flat prior to starting the project and blend stones from multiple crates or boxes to ensure a full range of color for an authentic appearance. Also, it is important to estimate material needs carefully. To determine how much stone is needed, begin by calculating the square footage of the area to be covered (length times height). Be sure to include the area of any windows or doors. Then subtract the number of lineal feet of corner pieces that will need coverage. Finally, be sure to allow for a small percentage of waste (5-10%).
Next, the installer must apply a weather resistant barrier such as tar paper to the surface to be veneered. He or she should overlap the barrier 4″ in shingle fashion and, where possible, wrap metal lath over the barrier to provide a minimum of 3/4″ penetration into the framing. The lath should then be fastened to the studs with galvanized nails or screws spaced 6″ on center and lapped at outside and inside corners.
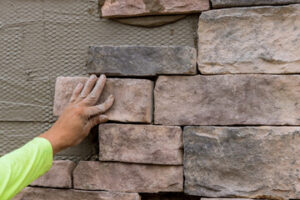
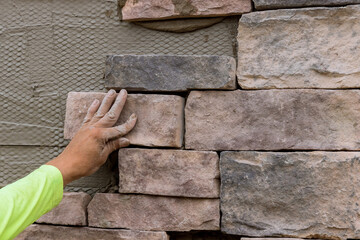
After the weather barrier is installed, a thin layer of mortar should be applied to the back of each piece of stone to help hold it in place. This mortar should be tinted to match the stone for a more natural look. Some manufacturers also offer a pre-mixed polymer modified mortar that requires only the addition of water for mixing. This type of installation system is typically easier to use than a traditional mortar scratch coat and provides a more durable finished product.


 A planter or letter box is a great way to add color and personality to your home. It can be made from wood, metal, plastic, or other materials. You can also use it to grow flowers or vegetables. It can be hung on the wall, placed on the floor, or set on a table. There are many different types of planters and letter boxes, so choosing one that fits your style is important.