Concrete Stone Facing

Add Character to Your Home With Concrete Stone Facing

Stonecrete veneer is a durable and affordable option to add character and charm to your home. It can be installed over clean concrete, masonry, and stucco walls.Concrete Stone Facing

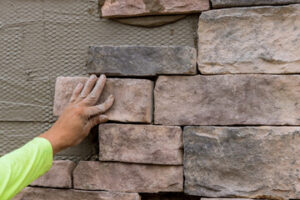
To prepare for your project, make sure the wall is ready to accept stone. Then mix a mortar from 1 part type S masonry cement and 2.5 parts sand.

Stone is one of the heaviest and densest materials used in construction. It is also highly fire-resistant and has a natural durability that resists environmental damage, including fading over time. It is also relatively low-maintenance and requires only periodic repairs from a skilled mason. However, stone is more expensive as a material, and installation is labor intensive.

Manufactured Stone is a popular alternative to natural stone, but has its own set of limitations and problems. Like all concrete-based products, manufactured stone is susceptible to moisture damage if left untreated. It is therefore important to treat all manufactured stone veneer applications with a silane-based, non-film forming, breather-type masonry sealer. This will increase the durability of your project and help prevent water penetration and resulting mold growth.

In addition, it is a good idea to use a rainscreen system when installing stone veneer on your home. This will reduce the amount of rain and snow that can penetrate the walls, preventing moisture from damaging the stone, framing or siding of your home.

Another problem that can occur with some types of stone facing is Efflorescence, a white residue that appears on the surface of certain stones when they come into prolonged contact with moisture. It is caused by the release of salts from the cement in the mortar, and can be removed by washing with water and a mild detergent.

It is also possible to add color pigments to the mix for a variety of finishes. This will give you the ability to match your stone with the surrounding colors of your home, and allow for more customization in your finished product.

In addition to color options, there are different textures available for both natural and manufactured stone. Ledgestone, roughly rectangular and mosaic styles are available, as well as several color blends. To enhance the texture of your project, you can add a textured scratch coat. This will also improve the adhesion between your mortar and the stone.

Styles & Options

A wide variety of colors, textures and shapes can be created using concrete stone casting. This allows for the production of a realistic surface that closely mimics natural stone. This gives builders the opportunity to create a unique and custom facade for their projects that can fit any design style or taste. The color of the stones will not fade with time and they are resistant to weathering and damage.

Stone facing can be used to craft a visually striking accent wall, frame a fireplace or completely clad an exterior facade. It can also be used to add dimension to a space or craft decorative elements like columns, arches and door surrounds. In outdoor spaces, stone facing can be used to build fire pits, water features and statues that add interest to any landscape design.

Compared to traditional masonry methods, mortarless easy-to-install stone veneer offers significant cost savings. However, you will need to strike a balance between the quality of materials and cost for the best value. It is important to choose the right type of stone and installation method to ensure a long-lasting and beautiful result.

While manmade and stone veneer products are easier to install, they lack the durability and lifetime weather resistance of natural stone. Manufactured stone veneers are prone to chipping, which exposes the concrete interior. This can cause problems with moisture management. On the other hand, natural stone is more durable, can withstand high moisture content and performs better in freezing/thawing conditions.

When selecting a stone facing system, you can choose between two overarching categories: individualized systems or panelized systems. Individually fabricated stone veneers allow you to hide high visibility cuts and reuse scrap pieces that would otherwise be discarded in other alternatives. They also have good workability and can easily adapt to an uneven substrate. Panelized systems are a good choice for larger projects because they install faster and require fewer tools.

Regardless of the type of stone you select, you will need to develop a moisture management plan. Moisture causes Efflorescence, which is white powdery substance that appears on the surface of the stone. To prevent Efflorescence, you must use a waterproofing membrane on the substrate and install flashing around all doors and windows. You should also make sure your gutter and drainage system is properly channeling water away from your stone veneer application.

Low Maintenance

Retaining walls are multifunctional additions to landscapes with varying slopes and gradients. They help hold soil and plants in place to prevent erosion while enhancing the look of the property. Many homeowners choose concrete wall block faces to give the sophisticated and ageless appearance of natural stone but at a much more cost-effective price point than traditional quarried stone. To further enhance the look of these concrete structures, contractors can add stone veneer to create a visually stunning exterior cladding.

When properly installed, stone veneer offers a long lifespan and requires little maintenance to keep its beautiful appearance. Because it is a real stone product, stone facing is durable in harsh environments and resists scratching and fading over time. The materials used to create stone veneer are also naturally resistant to moisture and freeze/thaw cycles, so they can be used in climates that would damage other cladding products like vinyl and wood.

Natural stone is a green building product that can qualify projects for LEED credits. It’s made from materials that are 100% recyclable, and unlike manufactured stone, it has no added dyes or pigments that can fade with exposure to sunlight. Additionally, natural stone is four times more durable and emits two times less carbon emissions than manufactured masonry.

Before installing stone veneer, the installer should prepare the wall surface to ensure that it will adhere. This includes ensuring the concrete or concrete masonry substrate is free of dirt, waterproofing coatings, paint, form oil and has a rough texture to promote a mortar bond. The installer must also ensure the concrete is cured prior to installation.

If the masonry surface is not sufficiently cured, it may be necessary to install a drainage mat or furring strips prior to the installation of stone veneer. This will provide an air gap between the masonry and the veneer, and it can also serve to reduce the risk of water seepage through the stone face that could potentially compromise the integrity of the foundation.

Whether you’re constructing a new home or updating the appearance of an existing structure, stone veneer is an easy way to improve the curb appeal and value of your property. Using stone facing to craft an accent wall, frame a fireplace or clad the entire foundation facade can instantly elevate your property. If you’re considering adding stone to your next project, contact us for more information about our wide range of options.

Easy Installation

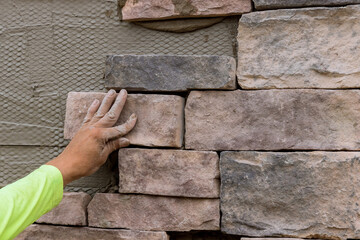
Many homeowners choose to install stone facing on their walls, pillars, and arches to add texture, warmth and style. They can be laid with tight-fitting mortar joints for a more traditional look or without joints to achieve a “dry-stacked” appearance. Stone and brick veneers are available in a variety of shapes and sizes and can complement any style home. They are also a great option for a fireplace accent wall to frame the focal point and create a dramatic statement.

The installation process is relatively simple and straightforward once the proper steps are taken to prepare the surface. Most importantly, the installer must ensure that the wall to which he or she is installing the stone veneer is plumb. This will expedite the veneering process and help produce a more polished finish.

It is a good practice to lay out all of the veneer stone flat prior to starting the project and blend stones from multiple crates or boxes to ensure a full range of color for an authentic appearance. Also, it is important to estimate material needs carefully. To determine how much stone is needed, begin by calculating the square footage of the area to be covered (length times height). Be sure to include the area of any windows or doors. Then subtract the number of lineal feet of corner pieces that will need coverage. Finally, be sure to allow for a small percentage of waste (5-10%).

Next, the installer must apply a weather resistant barrier such as tar paper to the surface to be veneered. He or she should overlap the barrier 4″ in shingle fashion and, where possible, wrap metal lath over the barrier to provide a minimum of 3/4″ penetration into the framing. The lath should then be fastened to the studs with galvanized nails or screws spaced 6″ on center and lapped at outside and inside corners.

After the weather barrier is installed, a thin layer of mortar should be applied to the back of each piece of stone to help hold it in place. This mortar should be tinted to match the stone for a more natural look. Some manufacturers also offer a pre-mixed polymer modified mortar that requires only the addition of water for mixing. This type of installation system is typically easier to use than a traditional mortar scratch coat and provides a more durable finished product.

remodeling

How Much Does a Kitchen Remodeling Cost?

A well-designed and functional kitchen makes life at home more enjoyable. But the costs of Kitchen Remodeling Lexington KY can add up quickly. Materials make up the largest percentage of remodel expenses. Installing new cabinets and hardware is expensive, but high-quality materials last longer and look better than cheap alternatives. Switching to energy-efficient appliances and plumbing fixtures can also save you money in the long run.

Cabinets

remodelingThe biggest expense in a kitchen remodel is new cabinets, which can account for 14 to 41 percent of the total project cost. The exact amount depends on whether you’re planning to refinish or replace your cabinets, and the material you choose for them. Plywood and wood veneers tend to be cheaper than solid wood options.

If you’re on a tight budget, try to minimize installation costs by buying ready-to-assemble cabinets or finding bargains at the Habitat for Humanity Re-Store. You can also save on demolition costs and local dump fees by removing your old cabinets yourself and hauling them away to be recycled or donated.

If you decide to hire a professional to install your new cabinets, be sure to compare quotes from multiple companies. And don’t forget to factor in the cost of new paint and hardware for your cabinets, as well as any labor to remove and reinstall existing plumbing or electrical fixtures. Resist fancy add-ons, like cabinet and drawer dividers or vertical spice racks, that can increase your project costs. Instead, prioritize your must-have features and stick with standard drawers and cabinets that won’t break the bank. This helps keep your budget intact for more important upgrades later on in the project, such as a fresh coat of paint or a brand-new dishwasher.

Countertops

The cost of countertops varies widely based on the material you choose and your location’s labor rates. The National Kitchen and Bath Association estimates that countertop expenses account for 11% of total kitchen remodel costs.

Budget-friendly materials like tile or laminate can save you 50%-80% compared to granite. Quartz is another popular option, but it can be pricey. It’s heat-, scratch-, chemical-, and stain-resistant and comes in a variety of colors and patterns.

When choosing a countertop, consider your goals and lifestyle. For example, if you’re thinking about selling your home in the future, you may want to opt for high-quality counters that will increase the value of your property.

Make sure to take into consideration the type of edging you want and any cutouts, as these can add significantly to your countertop’s overall cost. Standard edging options include eased, beveled, or bullnose. You should also consider the cost of disposal and installation. Labor charges vary by contractor and can depend on the size of your project, the style of your kitchen, and whether you’re changing the floor plan. Also, any specialty work, such as rewiring lighting or moving plumbing or gas lines, will increase your cost.

Appliances

A kitchen remodeling project includes the installation of new appliances. This includes a range, oven, microwave, dishwasher and refrigerator. The costs of these vary depending on the brands and features chosen, but a typical appliance package runs between $2,500 and $4,300 with installation.

The addition of kitchen lighting is another key element to consider during a remodel. This can include ambient ceiling lights, pendants or chandeliers over the kitchen island or dining table as well as task lighting, like under-cabinet lights or LED strip lighting, in drawers and cabinets. A good rule of thumb is to plan on spending $500 to $2,000.

It’s important to consider your goals and how they relate to the resale value of your home when choosing products and materials for your remodel. For example, investing in high-end finishes may be more expensive, but they can add significant resale value if your property is in a popular area. Likewise, it’s not smart to knock down walls just because you want to open up the space; some walls are load-bearing and require professional help to remove. Be sure to work with an experienced contractor to avoid any surprises that may come up during the project.

Flooring

Depending on your flooring budget, you can choose from a wide variety of materials. Vinyl, resilient, or tile are all popular choices for kitchens because of their durability and affordability. Laminate offers a stylish look with little maintenance. For a more luxurious floor, consider natural stone like granite or marble. These floors are more expensive but add a sophisticated feel to the room.

You’ll also need to budget for new walls and ceilings. Replacing existing drywall can cost $2 to $6 per square foot, while a fresh coat of paint will run you $300 to $750. New piping can be pricey, too, especially if you’re switching from copper to CPVC pipes.

It’s important to remember that kitchen remodel costs can quickly add up, so you want to stick to your budget and only do what you can afford. For example, if you’re remodeling a small kitchen on a budget, it might make more sense to save money where you can by installing reused cabinets or using recycled materials instead of new countertop products. You should also focus on high-return improvements like painting walls and installing a new light fixture that will instantly add value to your home.

Lighting

Homeowners often encounter various terms with similar meanings when researching kitchen remodel prices. To avoid any confusion, homeowners should clarify the lingo with their contractor before making any major decisions. For example, a renovation may be a small change or addition, while a remodel is more of an overhaul. Additionally, a major/upscale remodel is typically more expensive than a standard remodel because it includes high-end and specialty items.

Kitchen cabinets are a significant cost for any remodel. The price of stock cabinets varies depending on the material, while custom cabinets are more expensive. Countertops can also vary in cost. The type of material, thickness, and shape all affect the final cost. Additionally, finishing options like edge routing or honed natural stone can increase the cost.

Upgrading your kitchen lighting is a simple but effective way to improve the look of your kitchen. A DIY swap of your outdated sink light for a farmhouse-style pendant costs about $50, while hiring a professional to install sleek recessed lights can run you $150 per fixture.

Some electrical projects are necessary during a kitchen remodel, including adding GFCI outlets and moving electrical outlets away from water sources. These updates can make your kitchen safer and more efficient.

Plumbing

If the kitchen’s layout remains largely unchanged, plumbing costs should be relatively low. However, changing the location of a sink or faucet can quickly increase these costs. For example, moving a sink from one side of the room to another could require the installation of new drain lines and gas or water supply pipes, and may even require the relocation of existing plumbing.

Installing new windows and doors can also add to the cost of a kitchen remodel. These costs can vary significantly depending on how many doors and windows are being installed, as well as their configuration. For example, installing a window that opens to the outdoors can be more expensive than a window located in a wall.

In addition to these fixed costs, homeowners should consider the cost of labor. It’s a good idea to obtain multiple quotes and choose contractors carefully, making sure they are licensed and insured. In general, a homeowner can expect to spend 20%-35% of the total kitchen remodel cost on labor.

Electrical

Changing the electrical system in your kitchen can be costly. It’s important to determine what you want versus need in your remodeled kitchen and plan accordingly. For example, it’s not just about the number of lights, you also need to think about the power required for appliances, a dishwasher, and possibly even a new refrigerator.

Moving and rerouting piping and plumbing is a big cost consideration, as well as adding more outlets or upgrading to energy-efficient options. If you’re remodeling an older home, the wiring might need to be replaced altogether. This can add up quickly when the electricians are at work and requires time and materials.

Choosing the right materials for your kitchen will also impact the final cost of your project. Natural stone products like granite and quartzite are luxurious choices with a price tag to match, while other durable options such as ceramic tile can be less expensive and still offer an attractive look. Regardless of what you choose, it’s best to come up with a budget early and be prepared for unexpected expenses during the project. This way, you won’t go overboard and risk putting your house up for sale at a later date.


roofing

Types of Roofing Materials

Roofing materials offer protection against weather elements. They also help control heat loss and gain, keeping your home warm in winter and cool in summer. The right roofing material can enhance a building’s architecture and provide design coherence. Choosing the best material depends on many factors, including balancing cost and durability. For more information, check out your local Roofers Round Rock TX

Asphalt Shingles

roofing
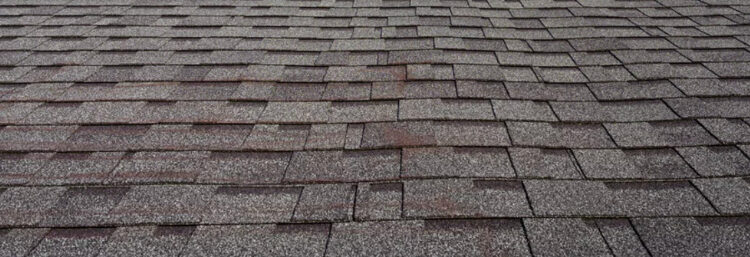
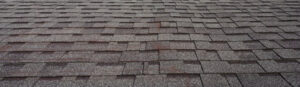
Asphalt shingles are among the most common roofing materials used on homes. They’re economical, easy to install, and available in various colors. They work well on most roofs, but do not work well on flat or low-sloped roofs. They’re also not as energy efficient as some other roofing materials.

There are two basic types of asphalt shingle: three-tab and architectural (also known as dimensional). The three-tab variety is simple flat shingles that connect to one another to create a uniform appearance. The more popular architectural shingles are constructed of multiple layers laminated together to create a dimensional appearance. They’re available in many different shapes and sizes, including curved and scalloped styles. They’re also available in a wide range of tones, from traditional black and brown to grays and even some weathered or rustic looking shingles.

Shingles are manufactured to be durable and long-lasting. They’re generally rated to resist 110-130 mph winds and most offer high-wind limited warranties. They’re often made of a fiberglass mat saturated with an asphalt coating and then surfaced with ceramic-coated opaque mineral granules that give the shingles color and weatherproofing qualities.

The granules are important for protecting the underlying asphalt from UV rays. They also help insulate the roof from extreme heat and cold and provide resistance to fire. In addition, the granules absorb and reflect solar energy to help keep a home cooler in hot temperatures and warmer in cooler ones.

Other raw materials that go into the manufacturing of asphalt shingles include recycled paper, cellulose fibers, and various minerals such as rock salt and clay. There are also certain chemical additives to the asphalt that add a layer of protection and enhance the durability of the shingle.

Because they reflect sunlight rather than absorbing it, asphalt shingles are very effective at cooling a home. They’re also able to significantly reduce the noises of traffic, airplanes, and barking dogs from filtering through a house’s walls and ceilings.

Aside from their ability to reduce the temperature in a home and save on energy costs, asphalt shingles are a good choice for homeowners concerned about the environment. There are now a number of roofing products that are designed to incorporate a reflective asphalt coating that helps prevent the sun’s UV rays from heating up a building.

Wood Shingles

Wood shingles can add a natural look to any home, complementing its scenic beauty and adding depth to the exterior. There are many different types of wood shingles, so homeowners can choose one that best suits their taste and complements the traditional or modern elements that make up the home.

Wood shakes and shingles can be used in combination with other roofing materials to add visual interest to the roof. They can also be crafted into different shapes and sizes to add a more intricate design to the roof, highlighting conventional and unconventional features of the home’s exterior. They are available in a wide variety of colors, allowing homeowners to create a custom look that complements the architectural style of their house.

A wood shingle is a waterproof wooden tile for the outer cladding of buildings – more typically roofs but sometimes walls as well. They can be made from a range of woods, including red cedar (which has a unique color and aroma) and eastern white pine. In the UK, they are most often made from oak or sweet chestnut, which have a high tannin content and are naturally durable. Traditionally, they were made from timber shipped from abroad, but in recent times, western red cedar has become the most common choice for shingles, as it’s more readily available and is just as durable.

The main difference between a shingle and a shake is that a shingle is shaped, while a shake is raw, unshaped wood. The shape of the shingle determines its durability and appearance. Edge grain shingles are cut perpendicular to the tree rings and are the most stable, but they are usually more expensive. Flat grain shakes and shingles are cut parallel to the tree rings and are more likely to split and distort over time.

Both shakes and shingles can be stained in order to protect the wood and enhance its look, but it’s important to keep in mind that this will add to the overall cost of the roof. Maintenance is also an important consideration for wood shingles and shakes, as they need to be cleaned and treated with protective coatings at least twice each year to ensure longevity.

Metal Shingles

Metal shingles have gained popularity in recent years due to their durability, energy efficiency, and style. They look like traditional asphalt shingle roofs but provide superior weather protection that increases home and building value and helps reduce energy bills.

The beauty of a metal shingle roof is its ability to blend in with traditional architecture. This makes them a great choice for homeowners who want to keep their home’s exterior look consistent without deviating from what is standard in their neighborhood.

A metal shingle roof can also add a more dramatic look to a house than an asphalt shingle roof. There are a variety of colors and designs available to choose from so homeowners can create a custom look for their roof. Some metal shingle systems even come with pre-formed flashing details for the most seamless fit possible. This means that a homeowner can save money during the roofing process by eliminating the need for a professional to hand-bend flashing details on-site.

Another advantage of a metal roof is its high wind resistance. The interlocking nature of a metal shingle system provides extra strength, helping to ensure the integrity of a roof in areas with strong winds. This added strength and protection from weather elements can help a metal roof last 2-3 times longer than an asphalt shingle roof.

It is important to note that while a steel roof fares better than an asphalt shingle roof in the face of extreme weather, it can still be damaged by hail. While pea-sized or even dime-sized hail won’t damage a metal roof, larger hailstones can cause significant roof damage. It is therefore a good idea to get a roof that is covered by homeowner’s insurance in cases where large hail is prevalent in the area.

Another benefit of a metal shingle roof is that it is a lighter material than asphalt shingles. This means that a person can easily carry it up to the roof for installation and will put less stress on their body during the process. This also means that a metal roof can be installed on an existing asphalt shingle roof, saving the cost and hassle of a roof tear-off.

Composite Shakes

Before asphalt and composite shingles became popular, natural cedar shakes were one of the most common types of roofing. They’re different from traditional shingles in that they’re crafted from split logs, creating an attractive rustic appearance. However, because they’re not a single piece of wood, they’re prone to issues like rot, cupping, nail popping, water absorption, mold growth, splintering and graying / fading. While preservatives and chemical treatments are used to prevent these issues, these aren’t foolproof.

The beauty and elegance of cedar shakes are still desirable in today’s market, but these natural shingles aren’t ideal for all areas. For example, in mountain communities or areas with a fire ban, a real cedar roof can be a liability. Durable composite roof shingles are the perfect alternative. They’re aesthetically appealing and come with the advantages of long term performance, low maintenance, quality and return on investment.

Composite roof shingles are made from recycled materials, making them environmentally friendly. They also provide an authentic look and feel that rivals that of the natural materials they’re modeled after. DaVinci is an example of a company that offers a line of composite slate and shake products that are incredibly durable. Their Bellaforte shake is modeled from actual cedar shakes and is available in nine colors. EcoStar, another company that offers a variety of synthetic roofing tiles, is known for their Majestic Slate and Enviroshake products, both of which are designed to mimic the color, natural texture and durability of quarried slate and hand-split or machine-sawn cedar shakes.

Both of these companies offer a variety of composite shake and slate products, including multi-width and single-width options to match the thickness of a genuine cedar shake or slate roof. The product that’s right for you will depend on the amount of curb appeal you want and your budget.

Compared to the high cost of installing real cedar shakes in Great Falls, MT, you’ll save money with composite shingle roofing. Plus, they’re more durable against our harsh Montana climate than traditional shingles. And, unlike real wood shakes, composite shingles are fireproof, so you’ll protect your home from potential damages caused by lightning and wildfires.

Planter & Letter Boxes

Planters & letterboxes can be made from a variety of materials. They can also be painted, stained, and dyed. The type of material used depends on the style of the garden or landscape.  For more information about planters & letterboxes visit Retaining Walls Perth.

Before hiding a letterbox in a Florida state park, contact the park manager to ask permission for the location. Be sure to mention the method of hiding (digging is generally not permitted) and other site attributes.

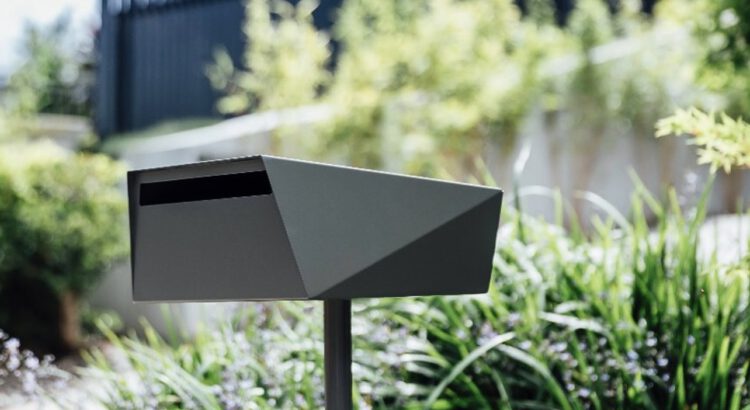
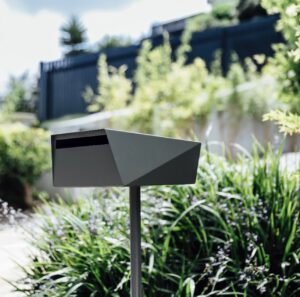
A planter or letter box is a great way to add color and personality to your home. It can be made from wood, metal, plastic, or other materials. You can also use it to grow flowers or vegetables. It can be hung on the wall, placed on the floor, or set on a table. There are many different types of planters and letter boxes, so choosing one that fits your style is important.

Depending on your budget, you can choose different materials for your planter. Fiberglass is a popular material for planter boxes because it is durable and can be used indoors or outdoors. It is also easy to clean and requires very little maintenance. Another option is concrete, which provides a sturdy base but can be heavy and difficult to move once filled with plants.

Cedar and pine are ideal woods for planter boxes because they are water-resistant and rot-resistant. You can also choose to purchase pre-treated lumber from a local mill. These pieces will last a lot longer than raw, untreated lumber. If you decide to buy treated wood, make sure it has a label that specifies it is water-resistant.

Once you have your lumber, you need to build the box. First, you need to cut the sides of the box. Then, you can drill the end boards to match the length of the long sides. You can attach the feet once the side and end boards are screwed together. Once the legs are connected, you can finish the planter by lining it with landscaping fabric and adding potting soil.

Cut a piece of landscape fabric larger than the bottom to line your planter. Ensure the seams are properly sealed to prevent leaks and avoid any dirt leaking onto your plants. Once the planter is lined, add potting soil and your favorite plants. Remember to add enough soil to allow for good root growth. You can also place a small rock in the bottom of your planter for drainage.

Planters & letterboxes can be made from wood to add an elegant, rustic look to your home. They can also be used to grow herbs, flowers, or vegetables. They are a great addition to any patio or garden area. They are often a focal point and can even be used to show off your personality. You can choose various styles and shapes to make a unique planter box. Some are shaped like letters, while others are slatted or rectangular. The type of wood you choose can affect the appearance of your planter.

The first step in building your planter is to assemble the sides. To do this, lay the 16″ 1x4s on the ground side by side and then nail them together. Next, lay the planks for one side on top of the two 1×2 corner supports. You may need to use a level to ensure the planks are positioned straight on the corner supports. Once the planks are set, nail them in place with brad nails. You will need to ensure that the side planks are fixed into the 1×2 supports so that the corners of the planter are square.

To protect your plywood planter from moisture, seal it with a water-resistant sealant. This will help prevent the wood from warping in the future. You can also paint your planter to create a more vibrant, personalized look. If you decide to paint your planter, you should know that the plywood is exposed to moisture and can warp if not sealed properly.

If you want a unique display of your flowers or plants, try planting them in a custom-made planter that sells giant custom-letter-shaped planters for every alphabet letter. The company will design the planter and handle all other processes, such as packaging and shipping. Buying a planter from this company will save you time and money.

Whether you live in an apartment or a home with a backyard, a planter box can be a great way to add greenery and color to your home. You can choose various colors, sizes, and designs to match your aesthetic. Regardless of the planter you choose, it is important to remember that it should be sturdy enough for the plants you plan to grow. If you need more clarification, ask an expert or do some research online to find out what types of plants are best suited for a particular planter.

One of the most popular ways to decorate a planter box is with flowers and decorative plants. You can choose from a variety of blooming plants, and you can also try mixing large and small flowers to create a more appealing look. You can also color-coordinate the plants to match your home or choose colors suitable for the season. For example, red and white flowers are ideal for winter and Christmas.

Many use planter boxes to grow vegetables and crops such as berries, tomatoes, and zucchini. These planters can improve your home’s appearance and help you save money on grocery bills. In addition, they can be a great way to get your family involved in gardening.

Several different kinds of planters are on the market, including metal ones. Some are made from galvanized steel, while others are rust-resistant and have a powder-coated finish. They are also available in some colors, from basic gray to bright red. Moreover, they are easy to assemble and require little maintenance.

If you’re looking for a unique way to make your home stand out, consider adding a planter box in the shape of your last name. This will add an elegant touch to your entrance and help your guests identify your house. Moreover, you can even add a letterbox to the start of your last name to make it even more personalized.

Another type of letterbox is an “art” letterbox containing a rubber stamp circle poem. These are often hidden in locations such as the Yorkshire Sculpture Park. These are usually arranged in a “ring” with other letterboxes and are intended to encourage people to visit these locations.

Many options are available if you’re interested in making your planter box. You can use plastic, wood, or metal. You can even paint your box differently or use a stencil to add a design. These boxes are great for gardens and can be used to grow herbs, vegetables, or flowers. They are also a great way to beautify the exterior of your home or office.

Creating a planter box from scratch can be fun and rewarding, but it can be expensive. Buying a kit is a good option if you want to invest less money in your project. These kits typically come with detailed instructions and are easy to follow. They’re also a great way to practice your skills before building something more complex.

When you’re ready to start your project, you’ll need basic tools and supplies. First, you’ll need to decide what size and style of box you want to make. Next, you’ll need to find where it will be placed. This may be on your front porch or in the backyard. If you put the planter in your backyard, consider making it bigger to support more plants.

You’ll also need to choose the type of plants you want to plant in your box. If you’re planting flowers, you should choose bright colors. These will help to attract birds and other insects to your garden. If you’re growing vegetables, you must plant hardy varieties resistant to disease and pests. If you’re planting herbs, you should choose more aromatic varieties.

Once you’ve chosen the plants you will grow, you can prepare your planter box for planting. Begin by laying down a protective layer of plastic garbage bags or drop cloths to protect the ground below from damage. Once the box is finished, you can fill it with potting soil and plant your seeds or seedlings.

The SnapPot is a versatile flower planter for mailboxes, posts, and patio and walkway columns. It’s durable, UV-resistant polyethylene and comes in black, white, brown, or gray. It will fit around most standard mailboxes and can be easily adjusted to wrap around a post. It also has 4 weep holes to release excess moisture.

asbestos removal

The Importance of Hiring an Asbestos Remover

While asbestos use has dropped due to regulations, product bans, and safer alternatives, people are still exposed when the material is disturbed. This may happen during renovation, demolition, and home or building maintenance. Visit Website to learn more.

A professional should inspect the property and take samples. They will test the samples with polarized light microscopy and air-quality tests.

asbestos removal

Asbestos is a naturally occurring mineral that is extremely strong and fire-resistant. Its fibrous properties made it ideal for building materials such as floor tile, roofing materials, and siding. Unfortunately, asbestos also poses a health hazard because it can cause respiratory problems such as mesothelioma and lung cancer.

If your home contains deteriorating or disturbed asbestos, you should have it cleaned by a professional to prevent exposure. However, since this is a toxic substance, it should only be handled by certified professionals under controlled conditions.

When removing asbestos, a good way to keep the dust down is to wet the material before working with it. This will help prevent the spread of airborne fibers and make the material easier to remove. The method used to water the material involves applying a composition containing a cellulosic polymer, such as hydroxypropyl cellulose, to the asbestos-containing material. The composition is sprayed or applied with a brush. It takes about 24 hours for the gel-like composition to completely penetrate most asbestos-containing materials, such as coatings and plasters.

Once the material is wet, it can be removed with various methods. If a professional tests the material to determine if it contains asbestos, they may spray the surface with a fine mist of water mixed with a small amount of detergent. This will prevent the fibers from dispersing and allow them to take an accurate material sample for testing.

Using mechanical forces, contractors can separate the wet asbestos from its substrate and dispose of it. This is much less hazardous than other wet removal techniques. This method can also be used on textured and decorative coatings that contain asbestos.

Before a contractor begins work, they will turn off your facility’s HVAC system to ensure that dirty air doesn’t circulate throughout the building. They will also seal off the area and build a decontamination enclosure around the asbestos. Once the reduction is finished, crew members will wet the contaminated surfaces to reduce the spread of particles into uncontaminated areas. Then, they will pack the waste in containers and load it onto special hazmat trucks for disposal.

If asbestos is present in your building, you must hire trained professionals to remove it. These experts use specialized PPE like gowns, masks, and ventilators to protect themselves from dangerous airborne fibers. They are also familiar with all the laws and regulations that govern the removal process. Breaking these rules can result in enormous fines your business cannot afford.

Before asbestos abatement begins, your contractors will seal off the work area. They will cut off your building’s HVAC system and close off areas that don’t need work with tarps and heavy-duty adhesives. They will also set up a decontamination area. This is an enclosed space between the abatement area and the non-abatement area that includes a shower, equipment room, and clean zone.

They will then clearly mark all areas infected with asbestos so they can easily find them during the abatement process. This will allow them to work efficiently and quickly. They will not want to disturb a single drop of asbestos in the wrong place, as it could cause it to release its toxic fibers into the air.

It would be best to ensure that people and pets do not stray from the sealed-off area. They may come into contact with the asbestos and inhale it, which can lead to lung cancer and mesothelioma. You should also avoid performing any activities in these areas, such as dusting, sweeping, or vacuuming. These steps can stir up microscopic asbestos particles and spread them to other parts of your building.

It is also important to note that not all asbestos must be removed from your property. Some asbestos can be re-sealed or encapsulated instead. This is especially true if it’s in good condition and not likely to be disturbed during renovations or repairs. For example, if your asbestos is in a duct that’s not likely to be moved, you can cover it with a special fabric that can be purchased at safety equipment stores.

This type of repair is less expensive than removing it and is still effective in protecting you from exposure. However, it would be best to have a professional inspect the asbestos before proceeding with any repairs or replacements.

Asbestos is most hazardous when it becomes airborne. The fibers in floor tile, roof shingles and exterior siding, cement, automotive brakes, acoustic and structural insulation, and some pipe insulation are fine enough to be inhaled. When these fibers are disturbed and airborne, they can irritate the lungs and cause serious health problems. The only way to keep asbestos fibers from becoming airborne is to avoid disturbing them.

When professional abatement workers work in your home, they’ll shut down the entire HVAC system. This prevents dirt from circulating throughout the building and contaminating other house areas while the work is underway. They’ll also physically close off areas of the house that don’t need abating with tarps and heavy-duty adhesives.

Once the area is sealed off, the workers can begin working on the decrease. This can include sanding, cutting, or scraping materials containing asbestos. Any dust that is created will be wet mopped and HEPA vacuumed. The work area will be inspected to ensure all the materials outlined in the initial scope of reduction have been fully addressed. This is called a supervisor’s inspection.

If asbestos is present in your house, it’s best to leave the removal to professionals. Only people trained and qualified in handling asbestos can safely remove, inspect, sample, or repair asbestos materials. It’s important not to disturb asbestos-containing materials, especially when it’s in a crumbly or friable state, as this can release the fine fibers into the air.

If a professional decides that full asbestos removal isn’t possible or cost-prohibitive, they might perform an alternative process known as encapsulation. In this case, your pro will coat the asbestos-containing material with a high-quality sealant to prevent the fibers from escaping. This is typically less expensive than a complete removal. However, it’s important to remember that encapsulation isn’t a substitute for complete removal and can only be done with certain materials, such as pipe insulation. It’s inappropriate for most other materials, such as attic and wall insulation or drywall.

Asbestos is considered a hazardous waste, and it needs to be handled, transported, and disposed of in compliance with the appropriate laws. This typically means that all asbestos materials must be properly labeled, and there must be a warning on the outside of any package or container that contains asbestos. It’s also important that any asbestos waste is wetted to minimize the possibility of fibers escaping if the package is damaged during transport.

The most common products that contain asbestos are insulation, wall and ceiling tiles and shingles, vinyl products such as flooring and vinyl adhesives, and linoleum. Most of these products were used in homes and commercial buildings constructed between the 1940s and the 1980s. Asbestos abatement companies will check these materials for damage or wear, and they can perform an asbestos encapsulation or remove the materials to prevent any future exposure.

Professionals have the right equipment to handle and dispose of asbestos, and they will use proper safety protocols to avoid contaminating their work areas. They will double-bag the waste, and they will wear respirators to ensure that they don’t breathe in any of the dangerous fibers. They will also use a HEPA vacuum cleaner to clear the area of any remaining asbestos debris before leaving the work site.

Generally, professionals must take samples of various building materials to identify asbestos. They may use polarized light microscopy (PLM) to locate the microscopic asbestos in the materials. They will also perform air-quality tests in the work area to determine if asbestos has been released into the atmosphere.

In most cases, a permit is needed to remove asbestos from a structure. It’s important to hire a company with EPA certifications and extensive experience in the field, as they will be able to handle all necessary paperwork and comply with the law. They will also know how to properly and safely transport the waste to a hazardous landfill approved to receive asbestos. It’s important to note that improper asbestos disposal can have huge consequences, including fines and imprisonment.

Commercial Steel Buildings

Commercial Steel Buildings

Oklahoma Commercial Steel Buildings provide businesses with quick construction and the ability to customize their structures. They are also durable and low-maintenance.Commercial Steel Buildings

They are ideal for service industries like car repair shops, towing companies, and storage and shipping companies. They also make great agricultural buildings. They have open, clear-span interiors, allowing for column-free space and flexible floorplan layout.

A commercial steel building is a versatile option for your business’s infrastructure needs. They can be used for a retail store or an industrial manufacturing facility, as well as for many other purposes, such as warehouse storage and agricultural buildings. They can also be expanded, allowing you to add additional rooms and floors as your business grows.

The versatility of a Commercial Steel Building is largely due to their open floor plans and structure. Unlike other construction types, metal buildings are made with long-span frames that allow for more space inside the building without any obstructions from support columns. This makes them perfect for large manufacturing facilities or sporting arenas, where a large open area is needed to allow for unrestricted movement and maximum visibility of spectators.

Additionally, steel structures are easily customizable, with plenty of options for doors, windows, and colors available. This gives you the freedom to make your building exactly how you want it, while still staying within a budget.

This flexibility is why many businesses choose to use metal commercial buildings. They can be constructed quickly, allowing you to set up your store or office in just a few days, and they are durable enough to stand up to the harshest elements and most demanding usage demands.

As a result, many people are turning to steel commercial buildings for their business needs, and they are becoming an increasingly popular choice for new commercial construction as well as for renovations and additions to existing buildings. When you choose to build your next commercial space with a steel building, it will help to increase the value of your property, ensuring that you get the best return on investment possible.

If you’re ready to invest in your commercial property with a versatile and sturdy steel building, contact Worldwide Steel Buildings today to learn more about our extensive range of prefabricated options. We can design your building to meet your specific desires while also meeting all national and state requirements for excellence. We’ll work with you every step of the way to ensure that your building is the perfect fit for your needs.

Durability

Commercial buildings are subjected to a lot of wear and tear. They need to be able to withstand the elements, everyday use and the occasional collision with vehicles or equipment. When a commercial steel building is constructed with the best materials and workmanship, it can stand the test of time. With quick construction and low maintenance, these buildings can save your business a lot of money over the course of its lifespan.

Durability is a key feature that sets steel buildings apart from other types of structures, such as wood or concrete. Because steel is a naturally strong material, it can withstand the harshest of weather conditions. This means that your commercial steel building will be able to withstand high winds, heavy rains, and even earthquakes.

Similarly, steel is resistant to pests such as rats and mice, which can cause costly structural damage. This will save your company a significant amount of money in terms of pest control and repair costs, which are often higher with traditional building materials.

In addition, metal is a durable material that will not warp or twist over time. As a result, your building will be able to resist the infiltration of moisture, which can lead to mold, mildew and fungus growth. In addition, steel is not susceptible to termite infestation, which can be a major issue in other types of buildings.

Because of their durability, steel buildings are an excellent choice for businesses that deal with the handling or storage of heavy materials. For example, a manufacturing facility may use a steel building to store products or as an assembly area. In addition, a warehouse can benefit from the durability of a steel building, which can protect inventory from the elements and ensure that goods are stored safely.

Steel buildings can also be a good fit for a wide variety of retail and office uses. They can be built in a short amount of time, which can help to speed up the start-up process for new businesses. Additionally, these buildings can be designed with a number of different doors and features to accommodate the specific needs of each business.

Low Maintenance

Steel buildings are very low maintenance and can save a business money in both time and costs over the life of the structure. This is especially true for industrial structures that will be used to store equipment, vehicles or inventory in harsh weather conditions. Steel is also resistant to fire, rot and pests which are common concerns in many building types. Typical upkeep for traditional buildings made from materials like wood, brick and stone can be expensive and time-consuming.

Modern commercial metal buildings are often pre-engineered and are delivered to the construction site in pieces. This reduces the erection time to one third of what it is for a building constructed from traditional materials and can help businesses get their doors open faster. These structures are also easy to customize and come with a variety of finishes and colors to choose from.

Because of the durable, low-maintenance nature of the material, metal buildings will stand up to harsh weather conditions and last much longer than those built with other materials. In addition, the structure is more resistant to termite damage and won’t need to be treated on a regular basis with chemical pesticides. This will save you the thousands of dollars in costly repairs that voracious termites can cause to unsuspecting buildings.

These properties make steel buildings the ideal choice for a number of different service industries. They are the best option for warehouses and distribution centers where space to maneuver large machinery is crucial, or for service industry buildings such as auto repair garages, service and towing companies, and storage and shipping businesses. They can even be designed as multipurpose spaces that will combine office spaces with warehouses, retail or wholesale space, and other workspaces.

With quick construction, design flexibility, low maintenance and the ability to withstand harsh elements, Commercial Steel Buildings are the ideal choice for any type of business. They can be easily modified to accommodate changes in the workplace and are a great solution for businesses that need to expand or grow over time.

Customization

Customization is an important part of designing a commercial steel building. It allows you to design an entirely unique structure to meet the specific needs of your business. This customization process can help reduce the risk of future expansions and save you money over time. Whether you are planning a commercial storage warehouse, retail store, manufacturing facility, or anything else, we can help you find the perfect structure for your purposes.

In addition to customizing the size and design of your building, you can also choose from a variety of features that will make it more attractive. From the color of your panels and roof to the trim and wainscoting, there are endless options available to you. With the right choices, your building can look just as stylish and sophisticated as a traditional structure.

Steel buildings are perfect for a wide range of businesses, from automotive shops and agricultural facilities to medical clinics and offices. You can even use them for sports facilities and indoor batting cages. Steel is also ideal for manufacturing and industrial uses, including pump shelters, water filtration centers, container covers, and paint booths.

A custom metal building can also help you save on maintenance costs over time. It will not need as much upkeep as a wooden building because it is resistant to mold, mildew, and pests. This means you will spend less money on repair work and can focus your resources on other aspects of your company.

Besides the benefits listed above, commercial steel buildings offer more structural stability than many other types of structures. They can withstand heavy loads and intense traffic while maintaining their structural integrity. This allows them to withstand the vibrations and shocks that are common in most commercial applications. Moreover, they are highly flexible and can easily be expanded to accommodate your growing business. A custom metal building is the best choice if you are looking for a safe, durable, and cost-effective solution to your commercial space needs.

labor

Factors to Consider in Industrial Construction

If you’re planning on building an industrial facility, many factors must be considered. Understanding how these projects work, from site selection to government regulations, is important.

Unlike general commercial construction, industrial projects follow specific guidelines that account for environmental impact. This is particularly important for projects that may produce hazardous materials. Click https://www.taskforcelabor.com/ to learn more.

labor

Industrial construction projects involve a wide range of materials. Some of these are natural, and others are artificial. They include wood, cement, steel, concrete, and metals. They can also contain other elements, such as bricks and sand. These materials are used to construct buildings, bridges, and other structures. The market for construction materials is growing rapidly, especially in developing regions. A high demand for residential apartments, infrastructure investments, and increased highway construction drives it. Moreover, the increasing population in these regions is expected to fuel the growth of the construction materials industry.

The construction industry is one of the largest consumers of natural resources and emitters of greenhouse gases. However, there are opportunities to reduce this impact by using more sustainable materials. For example, by replacing wood with a material made from cellulose and recycled paper, the industry can cut its use of natural resources and significantly reduce its environmental footprint.

Another way to make a construction project more sustainable is to use modular building methods, which use prefabricated components that are then assembled on-site. These methods are more efficient than traditional building methods and can save time and money. They also have the added benefit of being safer for workers.

Many firms are experimenting with new materials that can be recycled or reused. For example, one company uses a durable, lightweight material to build walls and other interior features of commercial buildings. This is an alternative to the more common, expensive materials such as glass, stone, and concrete. Richlite is manufactured from recycled paper and is far more environmentally friendly than other common construction materials.

Industrial buildings are large facilities that house capital-intensive equipment and machinery for production processes. They can be found in various industries, including oil and mining. Typical features of industrial buildings include warehouses and parking lots to accommodate semitrailers. These buildings often require a three-phase power supply to run the heavy machinery.

The construction industry is home to the world’s most creative minds. But these skills could be better spent too often on procurement problems and logistical hurdles. By bringing standardization to the design, manufacturing, and shipping of construction components, industrialized construction can free these minds to create innovative, high-performance structures that improve lives, buildings, and the environment.

Industrial construction is an endeavor that requires a lot of logistics to coordinate production and distribution. It also involves the creation of structures that are used to store raw materials and finished products for transporting. Industrial buildings are usually located on the outskirts of town, away from residential areas. They are also larger and designed to accommodate heavy machinery that may need more space.

Industrial buildings differ from commercial construction because they focus on logistics instead of foot traffic. They are also designed to have more oversized doors and spacious corridors that accommodate large trucks coming in and out of the building with raw materials or finished goods. The design of an industrial project should consider the workflow and how people will always move through the building.

Another key difference between industrial and commercial construction is that industrial projects are often subject to more stringent government regulations. These include site selection, environmental impact, and zoning issues. To ensure that the specialized requirements of an industrial construction project are met, it is critical to work with contractors who have experience working in this industry.

A good way to streamline the entire industrial construction process is to work with a general contractor who can handle planning, design, and building. This will save time, money, and the headache of dealing with separate firms. This is also an advantage because it reduces the chance of conflicts when independent entities handle a construction job.

A design-build contractor will handle every aspect of the construction project, from the initial plans to final inspections. This type of contractor will save you time and money by streamlining the construction process, allowing you to get your building up and running faster. They also provide a single point of contact for all services, ensuring that your project is on schedule and within budget. This method of project delivery is ideal for businesses that are time-sensitive. It is also an effective solution for companies that need to save on construction costs while maintaining high quality.

The government sets the regulatory framework in which industrial construction projects operate. This includes many national, state, and local laws governing workplace safety and land use. As such, there’s a lot to keep track of, especially since changes in presidential administrations can create uncertainty about whether regulations will be rolled back or imposed.

The Occupational Safety and Health Administration (OSHA) has rules governing workplace safety and handling hazardous materials. Some of these requirements are common across all industries, while others are specific to the industrial sector. For example, the agency’s construction standards require workers to wear protective headwear. The agency also requires that companies provide a designated area for the disposal of hazardous waste and other materials.

In the past, OSHA used to name and shame firms that didn’t meet safety standards, but the agency has recently changed its approach. It now focuses on educating and helping companies comply rather than prosecuting them. Still, companies that fail to meet OSHA’s rules face fines and other penalties.

Construction managers must be aware of the latest industry rules to avoid hefty fines and other penalties. They can find helpful information online and consult with industry professionals for advice.

There are also international standards that can help businesses meet regulatory requirements. For instance, ISO 27001 is a globally recognized standard that supports secure collaboration and protects data from cyber breaches. This is vital for the construction industry, which handles large amounts of sensitive information. Achieving ISO certification promotes best practices and enhances reputation.

Other industry standards, such as ISO 22301, are designed to help businesses plan for business interruptions. This is important for construction companies, which rely on complex supply chains and have tight deadlines to meet. Implementing this standard enables organizations to mitigate risk, minimize downtime, and ensure profitability.

Another industry regulation to consider is the Davis-Bacon Act, which requires contractors to pay prevailing wages on federally funded construction projects. Proponents say this rule levels the playing field during the bidding process and prevents contractors from lowering wages to win jobs. Critics say the benchmark wages the law sets don’t accurately reflect regional pay rates and can exclude small construction firms from competing for federal projects.

Many safety measures must be taken during industrial construction. These include safety training, regular equipment inspections, and clear communication on site. These safety measures are essential for the success of a project. They also help to reduce indirect costs such as surety bond claims and insurance rate hikes.

The first step in safety is to make sure that all workers are trained on the specific machinery they will be using. This includes knowing how to operate the machine and understanding its hazards. In addition, all employees should have personal protective equipment. This will protect them from electrical, mechanical, physical, and chemical threats.

Restricting access to the construction area during work hours is also important. This is not only to keep people from entering a dangerous place, but it can also protect equipment from damage or theft. Strict security protocols will also prevent contractors from being accused of negligence or malpractice in case of a security breach or safety incident.

Workers must be aware of common safety risks on construction sites, such as falls, caught-in or between hazards, struck-by hazards, and electrocution hazards. Contractors and safety professionals must ensure that all workers know these risks and how to avoid them. Regular meetings should be held to discuss safety issues and address any problems.

While some construction workers may consider site safety measures to be a nuisance, these measures are essential for the safety of everyone on the job site. Without them, workers could be injured or even killed. If workers are injured on the job site, they should seek immediate medical attention.

The construction industry is unique in many ways, including its high rates of injuries and fatalities. There are several reasons for these high rates, including: low bid processes; the need to meet deadlines; environmental conditions due to outdoor working situations; and multiemployer worksites. However, safety issues in the construction industry can be overcome with proper planning and implementation of a safety management system. This includes identifying all safety procedures on the job site and making them easily identifiable with clear signage.

How to Repair a Fence

fence repair

A fence serves many purposes for homeowners. It can keep unwanted guests out, provide privacy, and add value to a home. But it can also be damaged by people or animals. Damaged fencing must be repaired promptly to avoid problems from escalating. Start by clearing the area around the fence you’ll be working on to ensure no obstructions. Then, take a look at the leaning section to find the cause.

Repairing Rotted Sections

Wood fences often rot because they’re in contact with water for an extended period of time. This can happen at the base of a post where it is in direct contact with soil or in the top portion where it’s exposed to rain or sprinkler spray. The best way to prevent rot is by ensuring that your posts are set into concrete or suspending them well above the ground. Putting a waterproof sealant on your fence will also help prevent moisture from damaging it. To learn more tips, visit this website at https://rcfence1.com/.

If a section of your fence is rotting or otherwise weak, you need to take action. If left unchecked, a rotting section can spread and eventually cause your entire fence to collapse.

One of the most common causes of rot is fungus that thrives in wet environments. These fungi will take in the water from wetter areas of the wood and transfer it to drier sections, leading to the breakdown of the material. When the fungus consumes the cellulose in the wood, it becomes weakened and susceptible to further damage.

Some types of wood are more prone to this problem than others, and some are more resilient to it than others. However, regardless of what type of wood you use for your fencing, keeping it dry is essential. This can be done by removing any vegetation that’s touching it, keeping the edges of the wood above ground level, and allowing it to completely dry after it becomes wet.

You can also reduce the likelihood of rot by using stain or another form of waterproofing at the time of installation, and reapplying it every few years to keep your fencing looking good and protected from the elements. If you see any evidence of a potential rot problem, remove the affected area and replace it with new wood.

Wood fences tend to sag over time, and the most common cause of this is that rail ends begin to weather or the fasteners securing them to the posts loosen. In many cases, you can tighten these rails by putting a metal post-rail connector in place and securing it to the fence. If you have a severe sagging section, you may need to put in a brace to support it.

Repairing Bent Rails

The fence rails are a structural element that hold the pickets and posts together. When a section becomes bent, the entire fence may bend or lean. The best way to repair this problem is to replace the damaged rails. It is very important to choose a new rail that matches the existing ones exactly and ensures that it is straight.

The first step is to identify the exact location of the bent rail. Once you find it, mark the starting and ending points of the damaged section of rail to make it easier to remove and replace the rail. Next, locate the wire sections that wrap around the rail along its length and use a pair of lineman’s pliers to untwist them. This will free the damaged rail from the rest of the fence. Once the old rail has been removed, measure the distance between the two adjacent posts and cut a new section of rail to match that distance.

Once the new rail has been cut to size, it is time to reinstall it. Using the same technique as you used to uncoil a wire, loosen a rail end on one of the corner posts and slide the replacement rail into place. Once the new rail has been firmly inserted, tighten the rail end to secure it.

A sagging or leaning fence is not only unsightly but it can also be a safety hazard for pets, children and people walking or driving by. This is usually a sign that the supporting posts have shifted due to soil conditions or strong winds. A professional can typically correct the issue by adding a brace or installing additional concrete to support the post.

Wooden fence boards and posts can rot due to a variety of reasons, including moisture, insect damage and general wear and tear. Fortunately, repairing and maintaining your fence is relatively easy. By inspecting and repairing your fence regularly, you can prevent problems such as loose boards or nails and even rotting posts from affecting the integrity of your entire fence. A properly maintained fence will last longer and look better.

Replacing Pickets or Boards

As time passes and your fence ages, it may begin to show signs of wear. Rather than a complete replacement, minor repairs and maintenance work can help keep your fence in good shape for years to come. Whether you’re replacing a few pickets, tightening gate hinges or sanding off mild rust and corrosion, these simple repairs will save you the expense of a full fence replacement.

Wood fence boards, or “pickets,” are long, thin rectangles of lumber that attach to the rails of a wooden fence at regular intervals to create a symmetrical and visually appealing fence. Generally, pickets are painted white, but you can choose any color that suits your property and taste. Often, only one or two pickets are damaged from a single incident, such as a fallen tree branch or a dog running through the yard. Replacing these boards is relatively easy and doesn’t require the use of power tools. Start by removing the old board with a crowbar and carefully prying it up without disturbing adjacent boards. Next, measure the size of the gap and cut a new board to fit it, using galvanized nails or screws for additional security.

If you have a wood fence that is rotting, you can salvage it by digging up the affected post and determining whether the damage is limited to the top of the post or extends down through the post. If the rot extends down through the post, you can replace it by securing a new, shorter post in its place and saturating it with a wood preservative.

Occasionally, you’ll encounter a post that has completely rotted away. If this is the case, you’ll need to dig a hole and install a new post in its place. If the damage is only on the surface of the post, you can often resurrect it by installing a metal post base and securing it to the existing concrete foundation with galvanized bolts.

Sagging fence gates can be easily remedied by purchasing an anti-sag kit at most hardware stores. These kits include a slat that supports the weight of the gate when it’s open or closed, and they’re attached to both the gate posts and the hinges.

Replacing Posts

If your fence has a significant amount of rotted posts, it may be time to replace them. This can be a very labor-intensive repair, but it’s also one that’s worth doing to protect your investment in the rest of the fence structure. Before deciding whether to undertake a post replacement, however, it’s important to assess the overall condition of the fence to determine whether the damage is acute, like from an accident, or chronic, such as from wood rot.

Depending on the cause of the problem, it might be possible to repair the post by removing the rotting section and installing a new piece. But it’s usually more cost-effective to simply replace the entire post if the damage is widespread or if the post itself has already been damaged by an insect infestation or other factors beyond simple rot.

To remove the old post, free it from any fasteners holding it in place. This could include metal brackets that hold prefabricated fence panels in place, screws holding wire fencing in place, or nails attaching wood rails to the post. Use a hammer or pry bar to loosen nails and a drill to unscrew screws. Once you’ve freed the panel, you can rock the post back and forth to loosen it and pull it out of the ground.

Once the hole for the new post is dug, add gravel and tamp it down to create a well-packed base. If the soil has a lot of clay, you might want to dig the hole deeper. If the post was previously set in concrete, you’ll need to dig down to uncover the concrete footing and then break it apart with a sledgehammer.

When the hole is prepared for a new post, position it and ensure it’s plumb using a spirit level. Then, fill the hole with concrete. Ideally, the concrete should extend slightly above ground level to allow rainwater to flow away rather than pool around the post and potentially crack it again in the future.

Once the concrete is poured, you’ll need to wait for it to cure. In the meantime, be sure to block off the area so that curious dogs or kids can’t get into your work and mess it up! Then, reattach any fence pieces that were removed and stain the post to protect it from weather damage.

The Different Types of Foundation Repair

foundation repair

When it comes to repairing your home’s foundation, the repair method you choose depends on several factors, including soil conditions and the severity of the damage. Preventative maintenance is important, but hiring a contractor to do significant repairs is best. Check out this website at https://www.sugarlandfoundationrepair.com/ for more details.

Look for signs of foundation problems, such as cracks in walls and doors that are stuck or don’t close properly. These are indicators of serious issues and should be addressed by a professional.

Structural engineers are responsible for the construction of bridges, buildings and other structures. They are also involved in ensuring that these structures meet the required standards and specifications. A structural engineer may also be asked to provide a foundation report. This type of report can help determine whether or not your home needs repairs, and what methods should be used to fix the problem. A professional should always inspect a foundation before beginning the process of repairing it. Having a structural engineer’s report will ensure that the correct method is used for your specific situation.

If you have noticed cracks in your walls, the first thing you should do is to call a foundation repair specialist. The engineer will inspect the area and will determine if the cracks are due to foundation movement or other factors. If the cracks are due to foundation movement, he will recommend that you install steel push piers or helical piers to support your house and foundation. These piers are drilled into the ground and then turned by large machinery to support the house. The helical piers are made of galvanized steel and have a helically-shaped leading point that looks like an auger or screw.

It’s important to note that there are different types of foundations, including slab concrete and pier and beam foundations. Slab concrete foundations are typically built on a flat graded surface. They are more prone to movement than other types of foundations. This is due to the fact that slab concrete is not as dense as other types of materials. A slab foundation that is showing signs of movement should be assessed by a professional to make sure the problem is addressed as soon as possible.

A structural engineer can also evaluate the condition of your basement and crawl space to see if there are any signs of moisture or mold. This can lead to damage to the structural integrity of your house. If the damage is severe, it can be a safety hazard and should be addressed immediately. In addition, it’s important to know that most contractors who specialize in foundation repairs sell the products they use for repairing your home’s foundation. This can create a conflict of interest and prevent the contractor from offering an unbiased opinion.

Concrete slabs

A concrete slab foundation is an effective and affordable option for building your home. But, like all other types of foundations, it can experience problems over time. If these issues are not addressed promptly, they may lead to structural damage and costly repairs. A good foundation repair specialist will be able to diagnose the problem and recommend an appropriate solution.

Slab-on-grade foundations can be repaired using a variety of methods. Depending on the severity of the issue, these may include resurfacing or reinforcing the foundation. In some cases, a professional will need to break into the slab and determine the cause of the problem. These problems can be caused by shifting soil, house settling, and other factors. In addition, they can be caused by water leaks and moisture buildup in crawl spaces.

Some early signs of slab foundation problems include cracks in the concrete and sticking doors or windows. These are signs of a weak foundation and should be addressed immediately. Other symptoms of a failing foundation include low resale value, high utility bills, and damage to the structure of the house. In some cases, a failing foundation can even collapse interior walls and floors.

Slab foundation repair can be a complicated process, and it is important to choose a reputable company. A quality company will use the latest technology and methods to ensure that the job is done correctly. This will prevent further damage and increase the resale value of your home. It will also save you money on repairs and improve the overall safety of your family.

There are several different ways to repair a sinking concrete slab, including slab jacking and steel piers. Slab jacking involves injecting a mixture of cement and water under the slab to lift it. This technique is effective for repairing sinking concrete, but it can be dangerous for plumbing systems because of its expansion properties. Steel piers, on the other hand, are more environmentally friendly and less intrusive than concrete piers. They are also a good choice for soil conditions that are difficult to penetrate with concrete piers.

Crawl spaces

Crawl spaces are the space beneath the floor of a home that house ductwork, utility cables, and other important components. The crawl space is also often used for storage, making it a valuable space in a home. However, a poorly maintained crawl space can lead to numerous problems. It’s crucial to keep up with crawl space maintenance and inspections.

One of the biggest issues is moisture. A damp crawl space can lead to mold and mildew growth, musty odors, and pest infestations. It can also cause wood rot and damage the foundation. It’s vital to install a proper vapor barrier and moisture control system.

Another problem with a crawl space is that it’s difficult to maintain. It’s not uncommon for homeowners to store items they don’t need in the crawl space, which can lead to a number of issues. This can include pests, like termites and rodents, that find shelter in the dark, musty environment of a crawl space. It can also make it more difficult to maintain and repair plumbing, electrical wiring, drywall, and insulation.

Finally, a poorly maintained crawl space can allow water to seep into the ground and damage the foundation of the home. This is often a sign of a sinking foundation and needs to be repaired as soon as possible.

While there are some advantages to having a crawl space, it’s vital to keep up with maintenance and inspections. Keeping up with regular maintenance can help prevent moisture issues, pest infestations, and other costly problems.

Unlike slab foundations, crawl spaces allow for easy access to plumbing, electrical wiring, and HVAC systems. This makes them a more desirable option for many homes. It can also be easier to fix a problem in a crawl space than in a slab foundation.

A home’s foundation is a vital part of its overall integrity. It supports the entire structure of the house, so it’s important to keep it in good condition. A cracked or leaking foundation can cause structural damage, which can be expensive to repair. Some signs of foundation problems are cracks in the exterior walls or floors of the house, leaks around windows and doors, and bowing or sagging floors. A damaged foundation can also cause problems with the interior of the house, including cracked drywall and sagging ceilings.

Basements

Basements can be a great way to add living space and value to your home. They can be used for a playroom, home theater, craft room, laundry room, workshop, bathroom or even a bedroom. However, there are some important considerations that need to be taken into account when building a basement, such as waterproofing and ventilation. If these issues are not addressed, they can lead to problems that affect the entire house.

When it comes to foundation repair, basements are one of the most common areas in which a homeowner will need help. It is important to be aware of the signs that indicate a foundation problem so that you can have it repaired right away. These include cracks in the basement walls, water intrusion after heavy rainfall, doors or windows that do not open or close, gaps in doorframes and drywall and bowed or bulging floors and ceilings.

Depending on the use of a basement, it may be possible to address some of these issues with relatively inexpensive methods. For example, by applying a moisture-blocking paint and adding a dehumidifier, it may be possible to prevent mold and mildew growth in the basement. In some cases, however, basements will require a complete overhaul, including waterproofing and ventilation.

While a basement can be a valuable addition to your home, it can also be a significant source of moisture and can damage the house if not properly designed. It is therefore crucial that you consult with a professional before starting construction on a new basement.

If you’re in need of foundation repairs, it’s important to find a company that specializes in basements and crawl spaces. These experts will have the knowledge and experience to diagnose and fix problems quickly and accurately. They will also be able to recommend solutions that will work best for your specific situation.

The reason that Dalinghaus Construction, and other basement companies only focus on basement repair, is that there are special skills, tools, and equipment that are necessary for this type of work. It is the same reason that carpenters, painters, and plumbers only specialize in their own fields of expertise.

concrete repair

What You Need To Know About Concrete Repairs

The main thing to know before you apply any repair is its modulus of elasticity. You need to also know the size of the area to be repaired, the application method, and the durability of the repair. If you don’t know all of these things, you can ask the repair expert to help you choose the right concrete repair for you. After all, the right repair will help your building look great, and it will make you feel good too! To get this done, call Level Ground Excavation today.

concrete repairModulus Of Elasticity

The strength of the repair material is determined by its modulus of elasticity or MOE. Ideally, the material should exhibit the same MOE as the original concrete to allow for uniform load transfer across the repaired area. However, the actual MOE of the repair material will vary depending on its application. For general repairs, a lower MOE means more flexibility and a higher MOE means more stiffness. To achieve a good bond, you should thoroughly prepare the repaired area before applying the repair material. 

The first step in determining the strength of concrete is to understand how it reacts to stresses. The modulus of elasticity of concrete is the force applied to the material to cause a structural response. The stronger the concrete, the stronger the structural response. The next step is to calculate the stress. Fortunately, concrete has excellent properties for this type of stress. The strength of the repair material can be measured using a cyclic load.

When a repair material is applied to concrete, it must be able to withstand high shear stresses. This is possible only by assessing its bond strength against the concrete’s underlying strength. The repair material can contain polymers and other additives to enhance its bonding capability, but it can only be as good as the weakest link. The weakest link is typically the concrete’s surface. Therefore, it is imperative to carefully prepare the repair area to maximize bond strength.

In addition to the compressive strength, the modulus of elasticity of concrete also increases with age. Although the two are not equal, the increasing rate of elasticity of concrete is smaller than the increasing rate of compressive strength. This difference may be due to the fact that the case material’s modulus of elasticity is higher than its grain. It can be as high as 1000 psi. It is important to ensure that you are using the right mix to repair damaged concrete.

The elastic modulus of concrete is determined using an empirical formula. Using this formula, you can calculate the elasticity of concrete with a single test. The results of the test are recorded in a stress-strain graph, also known as a load-deflection graph. The slope of this curve is the modulus. This can also be compared to the compressive strength of concrete after 28 days.

Application Method

The best method for applying repair materials is a combination of two different types of preparation. The preparation should be done at least a few days prior to the repair work and should not involve vibrations. Alternatively, the concrete should be self-consolidated. Depending on the type of repair, engineers may request a concrete test cylinder to determine the compressive strength of the concrete mix. The results of the test cylinders may be used as the concrete repair material. When the repair material is placed, the forms should be tightened, but not so tightly that they can’t be removed easily. When the repair material is applied, it must be allowed to dry for 72 hours with the forms in place. Wet mats should also be placed over the openings used for the placement of the material.

The material should be selected based on its properties and the type of damage to the concrete. Depending on the severity of the concrete damage, there are several repair mortar types to choose from. Those used for structural repairs should have a similar modulus as the concrete substrate. Nonstructural repairs may be made of materials with a lower modulus. In addition, repair mortars should have inadequate shrinkage compensation to prevent cracking after placement. Other properties that are important for a repair mortar include bond strength, permeability, water vapor transmission, and tensile and flexural strength. In addition to the above properties, surface preparation is critical to the success of the repair installation.

While routing cracks requires more labor, it can be an effective way to repair structural cracks. Concrete cracks are best repaired when the joint is low-modulus and accommodates movement. If the crack is active, moisture-tolerant epoxies are best for the job. Cracks that are wet can also be treated with these materials, but the effectiveness of the resin will depend on the number of contaminants present. While a low-modulus adhesive can be applied in cracks, it won’t allow significant movement of the concrete structure.

Another consideration when repairing a concrete structure is its depth. A thick section can generate excessive heat during the curing process of certain repair materials. A thin layer of concrete may experience spalling or delamination as it contracts and expands during colder months. Another consideration is the material’s coefficient of thermal expansion. Unless the repair material suits the particular concrete type and structure, the repair will most likely fail due to shrinkage. The bond between the repair material and the concrete is essential in ensuring that it adheres well and doesn’t debond.

Durability Of Repair

The most important parameter for evaluating the durability of concrete repair mortars is the bond between the repair mortar and the substrate. The right bonding strength ensures that the repair mortar withstands stresses that arise at the interface between the two materials. There are several factors that influence this bonding strength. Let’s take a look at a few of them. Firstly, morphology should be considered. The surface appearance of the cement-based repair mortar should be smooth.

Secondly, erosion resistance should be evaluated. Tests to assess erosion resistance involved the application of acid-base solutions with 5% HCl and H2SO4 by weight and a saturated NaOH solution. Then, samples were subjected to freeze-thaw cycles. The freezing temperature and 50% RH caused the concrete to shrink in two directions. Both methods resulted in cracking in the repair material. However, a test to assess the durability of concrete repair materials in this temperature range revealed that the ECC material was less susceptible to cracking than the FRPM mortar.

In addition to these tests, another factor that determines the durability of concrete repair materials is their compatibility with the structure. However, cement-based repair materials have been the subject of little research. As such, they can deteriorate just like conventional concrete. In addition, two additional factors affect the durability of concrete repair: its permeability and chloride diffusivity. Both of these parameters affect the penetration and degradation rate of aggressive substances.

In addition to addressing corrosion and abrasion, the durability of concrete repair materials is essential for conserving resources. Furthermore, they help to minimize the environmental impact of the repair process. When replaced, replacement building materials deplete natural resources and pollute the air. By its nature, concrete has the ability to resist chemical attacks, weathering action, and abrasion. While different concretes need different durability, the exact combination of ingredients and concrete placement and curing practices determine the durability.

The first step in repairing a concrete floor is to clean the surface thoroughly. It would help if you did this before mixing the concrete. Different types of concrete require different mix ratios, and some harden faster than others. Then, mix the concrete no more than you can use in the next 30 minutes. After mixing, you must let the mixture dry thoroughly. After this, you can apply a new layer of concrete.

If you are unsure whether you need concrete repairs, take a walk through your home. Notice if the soil is moving or settling. If you notice any areas that are uneven, call a contractor right away. A professional will also be able to replicate the original design of the concrete and mix it for increased durability. If you’re unsure of your abilities, learn more about the process and hire a professional.

A repair job is a great way to improve the look of a concrete surface. While concrete replacement is necessary for a major crack, small cosmetic repairs can be performed to fix the problem and keep it from getting worse. This way, the concrete surface remains strong and safe for use. This way, you don’t have to worry about a cracked floor any longer. You can even do a concrete patch job to make your steps look new again.

After repairing your concrete floor, make sure you understand the causes of the damage so that you can choose the right repair method. Once you understand why your concrete floor is damaged, you can start removing the damaged concrete or contaminants. Then, apply a repair designed to solve the problem. Don’t forget that a concrete repair should be durable and withstand the test of time and wear. If you are unsure about what you’re doing, consult a professional who specializes in concrete repairs.